




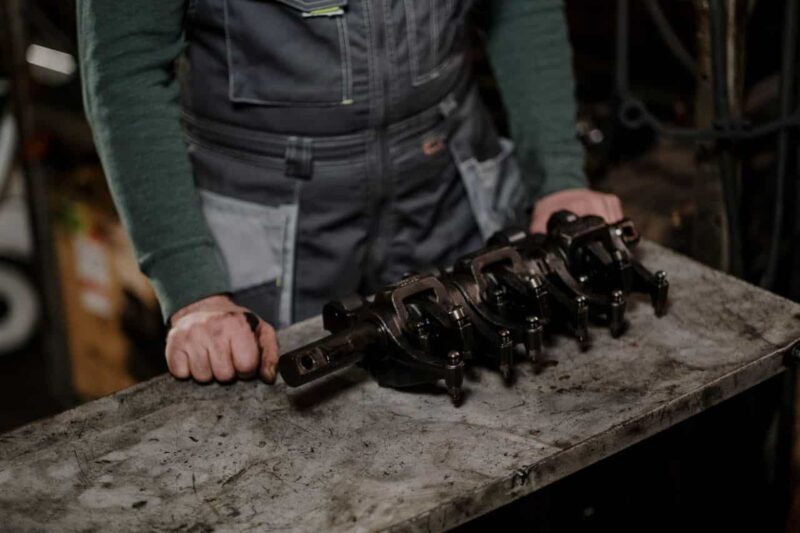
The crankshaft is one of the most critical components of an internal combustion engine. It converts the pistons’ up-and-down motion into rotational force that powers your vehicle. Because it operates under high stress and constant movement, a damaged crankshaft can lead to poor engine performance or complete engine failure.
Replacing a crankshaft is a complex repair that requires mechanical knowledge, specialized tools, and careful attention to detail. While experienced DIY mechanics may attempt the job, beginners should understand that the process often involves removing and rebuilding the engine. This guide explains how to replace a crankshaft safely and correctly.
When Does a Crankshaft Need Replacement?
A crankshaft rarely fails under normal driving conditions. However, it may require replacement if it becomes bent, cracked, severely worn, or damaged due to bearing failure or lack of lubrication.
Common signs that indicate crankshaft replacement may be necessary include:
- Loud engine knocking noises
- Low oil pressure
- Excessive engine vibration
- Metal shavings in the engine oil
- Engine misfires
- Crankshaft cracks or visible damage
- Complete engine seizure
Always confirm the diagnosis before replacing the crankshaft, as similar symptoms can result from worn bearings or a faulty crankshaft position sensor.
Tools and Materials Required
Before beginning the repair, gather the necessary tools and replacement parts.
You will typically need:
- Replacement crankshaft
- Main bearings
- Rod bearings
- New crankshaft seals
- Engine gasket set
- Torque wrench
- Socket and wrench set
- Engine hoist
- Engine stand
- Bearing assembly lubricant
- Engine oil
- Oil filter
- Plastigauge for bearing clearance
- Service manual for your vehicle
Using the manufacturer’s service specifications is essential for proper installation.
Step 1: Disconnect the Battery
Safety should always come first.
Disconnect the negative battery terminal to prevent electrical shorts or accidental engine cranking while working on the vehicle.
Step 2: Remove the Engine
In most vehicles, replacing the crankshaft requires complete engine removal.
This process generally involves:
- Draining the engine oil and coolant
- Disconnecting electrical connectors
- Removing fuel lines
- Disconnecting exhaust components
- Removing accessory belts
- Disconnecting the transmission
- Lifting the engine using an engine hoist
Place the engine securely on an engine stand before disassembly.
Step 3: Disassemble the Engine
Carefully remove engine components to access the crankshaft.
The order usually includes:
- Intake manifold
- Exhaust manifold
- Timing cover
- Timing chain or timing belt
- Cylinder heads
- Oil pan
- Oil pump
- Pistons and connecting rods
- Main bearing caps
Label bolts and parts during removal to simplify reassembly.
Also Read: Steering Rack Replacement – Ultimate Guide
Step 4: Remove the Old Crankshaft
Once the main bearing caps are removed, carefully lift the crankshaft from the engine block.
Inspect the following components:
- Main bearings
- Connecting rod bearings
- Bearing journals
- Engine block
- Connecting rods
If excessive damage is found, additional repairs may be required before installing the new crankshaft.
Step 5: Clean the Engine Block
Thoroughly clean all engine components before installation.
Remove:
- Old gasket material
- Metal particles
- Sludge
- Dirt
- Oil residue
Clean oil passages help ensure proper lubrication after assembly.
Step 6: Install New Main Bearings
Install new main bearings into the engine block and bearing caps.
Apply assembly lubricant to each bearing surface before placing the crankshaft into position.
Never install bearings dry, as this can cause immediate damage during startup.
Step 7: Install the New Crankshaft
Carefully lower the new crankshaft into the engine block.
Ensure that:
- The crankshaft rotates freely.
- Bearings remain properly seated.
- Oil holes align correctly.
- No dirt enters the bearing surfaces.
Improper installation can cause premature engine failure.
Step 8: Check Bearing Clearance
Use Plastigauge to verify the clearance between the crankshaft journals and bearings.
Compare the measurements with the specifications in your vehicle’s service manual.
Incorrect bearing clearance may result in:
- Low oil pressure
- Bearing failure
- Engine knocking
- Reduced engine life
Correct any issues before continuing.
Step 9: Torque the Main Bearing Caps
Install the main bearing caps in the correct order.
Using a calibrated torque wrench, tighten each cap according to the manufacturer’s torque specifications and tightening sequence.
Many engines also require an additional angle-tightening procedure.
Following the correct torque sequence ensures even pressure across the crankshaft.
Step 10: Reinstall Internal Engine Components
Reassemble the engine in the reverse order of disassembly.
Install:
- Connecting rods
- Pistons
- Oil pump
- Oil pan
- Timing components
- Cylinder heads
- Valve train
- Intake manifold
- Exhaust manifold
- Front and rear crankshaft seals
Replace all gaskets and seals with new components to prevent future oil leaks.
Step 11: Reinstall the Engine
Carefully lower the engine back into the vehicle.
Reconnect:
- Transmission
- Wiring harnesses
- Fuel lines
- Cooling system
- Exhaust system
- Accessory belts
- Battery
Double-check every connection before starting the engine.
Step 12: Add Fluids and Start the Engine
Refill the engine with fresh oil and install a new oil filter.
Refill the cooling system with the recommended coolant.
Before starting the engine, rotate the crankshaft manually several times to verify smooth movement.
Start the engine and monitor for:
- Oil pressure
- Coolant leaks
- Oil leaks
- Unusual noises
- Warning lights
Allow the engine to reach operating temperature while observing its performance.
Common Mistakes to Avoid
Crankshaft replacement requires precision. Avoid these common errors:
- Reusing worn bearings
- Installing bearings without lubricant
- Ignoring bearing clearance measurements
- Incorrect torque specifications
- Reusing damaged seals
- Failing to clean oil passages
- Mixing bearing caps
- Skipping engine break-in procedures
These mistakes can lead to premature engine failure.
Tips for a Successful Crankshaft Replacement
For the best results:
- Always use high-quality replacement parts.
- Replace bearings whenever replacing the crankshaft.
- Follow the manufacturer’s service manual.
- Keep all components clean during assembly.
- Use assembly lubricant on moving parts.
- Replace oil seals and gaskets.
- Prime the lubrication system before the first startup.
- Change the oil after the initial break-in period if recommended for your engine.
Taking your time during installation helps ensure long-term engine reliability.
Conclusion
Learning how to replace a crankshaft provides valuable insight into one of the most advanced engine repairs. Although the process involves extensive engine disassembly, careful installation, accurate torque specifications, and proper bearing clearance measurements are essential for a successful repair.
Because crankshaft replacement requires specialized tools and technical expertise, many vehicle owners choose to have the job performed by a professional mechanic. However, experienced DIY enthusiasts who follow the correct procedures and manufacturer specifications can complete the repair successfully. Proper maintenance, regular oil changes, and prompt attention to engine problems will also help extend the life of your new crankshaft and keep your engine running smoothly for years to come.
